AVID TITLES DON'T NEED TO BE TECHNICAL
It’s no secret that many offline Editors chose to ignore titles in their offline edit given the difficulty (and speed) of the tools that some of the non-linear editing systems offer. Yes, it’s true that often you can get away with a simple “Insert Title/Card Here” or put the information down in a Marker for an Assistant to do later. However, there are uses in being able to test something quickly on-the-spot. This article will investigate how you can do this in Avid across the older and newer versions.
Firstly, there’s nothing wrong with the direction both Avid (and Premiere) are heading in with their titles. I believe what Avid are doing with the removal of the legacy title tool was the right thing to do. Adobe/Premiere Pro’s removal of their legacy tool (although still accessible via a dropdown menu) is the correct choice given the new motion graphics templates among other quick-text decisions.
This quick technical guide will focus more on Avid, noting that Media Composer has recently removed the ability to use the legacy title tool once loved (and hated) by many. More, frequently Editors and Assistants transitioning between software versions choose to use an effect tool: SubCap.
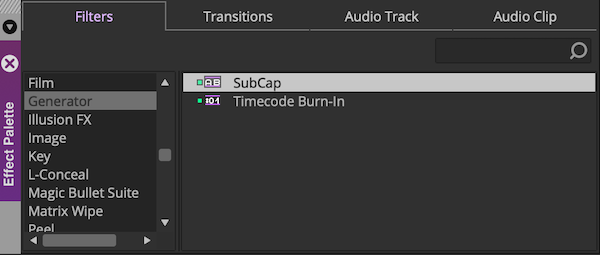
SubCap is an effect you can insert into filler on your timeline, which is supposed to work as a captions tool but works very well as a Title Tool for anything. Most importantly, like their new (and slowly improving) Avid Titler+ it does not need to “Generate” or “Render” any media and has no requirement for you to select a “Bin” for the title to go to, it sits on the timeline, like any other effect would. As with any effect, you can create an IN and OUT point on a blank section on the timeline and drag the effect into that range to fill the selected area with the effect (or in this case, title).
Once you have your effect in the timeline there are a few settings you want to be aware of but note that once you change these you can copy/paste this particular effect elsewhere on the timeline. In other words, once you do this once you won’t need to do it again.
After adding the SubCap to your timeline, place your cursor over the effect in the timeline and open your “Effect Tool”. Click on “Edit Global Properties…”

After that, navigate to the “Synchronize” tab.

What you will notice is that a large portion of the changes you make to one SubCap (or on our case title card) will affect all other SubCap effects on the same “Track”. This is not ideal for many Editors, although extremely useful if you know you want only a certain style, size, font etc. across cards on the same video track. In this instance though, I recommend for general purposes to select “Clip” for everything you see here. You only need to do this once if you copy/paste the effect.
From there, click “OK” and to begin making your title you want to change the “Caption Text”, which will appear as a simple text box to type words into.

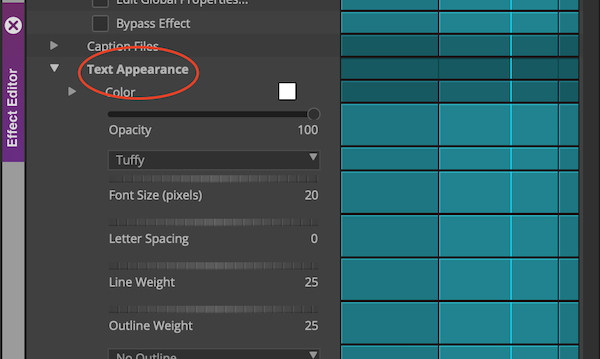
After that, it’s important to change your box settings (as by default the text sits within a black box). I usually turn the box opacity down to zero and adjust the “Extent”.

Lastly, change your “Text Appearance” to your preferred Font, Font Size and Colour etc.
Note on position of text: When you have the “Effect Editor” open you can click and drag the pink-coloured crosshairs that will appear in your “Composer” window (Record/RIGHT side) to move the text to your preferred spot. Some Editors like to activate the “Grid” found in the “Tool Palette” before doing so.
In summary, this guide is not written as a direct response to some of the new tools and the practice of using SubCap is more of an alternative approach to making titles. However, it is easy and simple to use once you follow this guide and create your first. For those who are hesitant to update to the latest version of Avid, it is nice to know that you are not forced to immediately adopt the new Titler+ Tool.
If you want to take your title work further, I recommend looking for guides on YouTube for Avid Titler+ and to also investigate working with Photoshop as Avid supports Photoshop layer imports.
Best wishes and happy editing!
Timothy Hadwen
Executive Committee Member
(eNews 104 - June 2021)